
Before becoming licenced hunters, newcomers and amateurs should be aware of a few important Monster Hunter Rise tips and tactics. This guide will help beginners on their quest to become the best monster hunter.
Monster Hunter is a series available for PC and Nintendo Switch that’s been known for not having the best boarding system for newbies, however, beginners might find themselves enjoying the series and getting a solid understanding of how all the systems and mechanics work together with the help of some helpful hints and tactics.
How do the quests work?
In Monster Hunter Rise, there are two places where players may undertake brand-new missions. Speaking with Hinoa in Kamura Village will begin one of the village quests. The game’s single-player Village Quests will introduce new hunters to the game without requiring an internet connection.
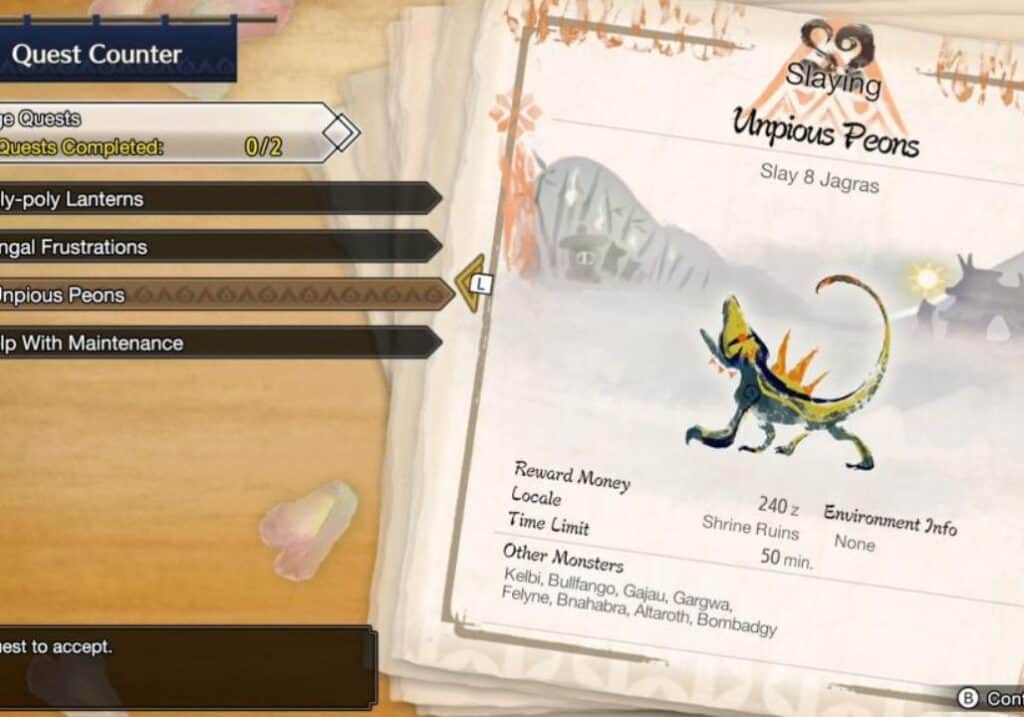
Players will want to accomplish Hub Quests in order to ultimately reach High Rank and watch the plot unfold, and may do so by heading to the Gathering Hub and speaking with Minoto there. Players have the option of participating alone or with up to three other hunters.
Once hunters start the quest, the large monsters in the area will all appear on the map. If a player has yet to encounter the monster, there will be a question mark on the map instead of the monster’s picture.
Once a monster has been killed and the quest is complete, players must carve the monster for materials by going up to it in order to collect materials that can be sold or used for crafting various items.
Eating before quests
Before embarking on a mission or expedition, players can stop by the Canteen to eat some Dango, either at the Gathering Hub or at the one outside the hub entrance in the hamlet. Dango can improve various stats and offer special perks that are useful for hunting.
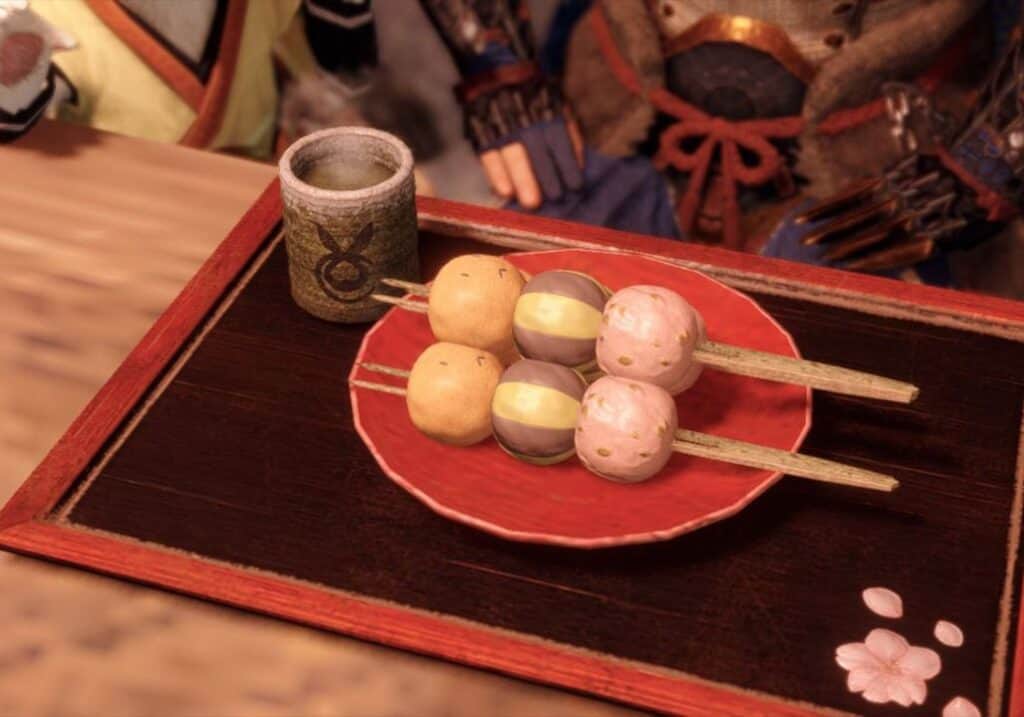
The perks of the Dango last only for a single quest and as a result, players must not forget to eat before every quest.
Also read: The Elder Scrolls Online (ESO): Coral Riptide armour location
Finding the most suitable weapon
There are several strategies for taking on monsters in Monster Hunter Rise as there are 14 unique weapons at the player’s disposal. Beginners may want to begin with simple weapons like the Sword and Shield and Dual Blades.
However, if a player wants to deal more damage at the expense of mobility, the Great Sword and Hammer are also excellent choices. The Hunting Horn and Bowguns are two more sorts of assistance that operate in the background.
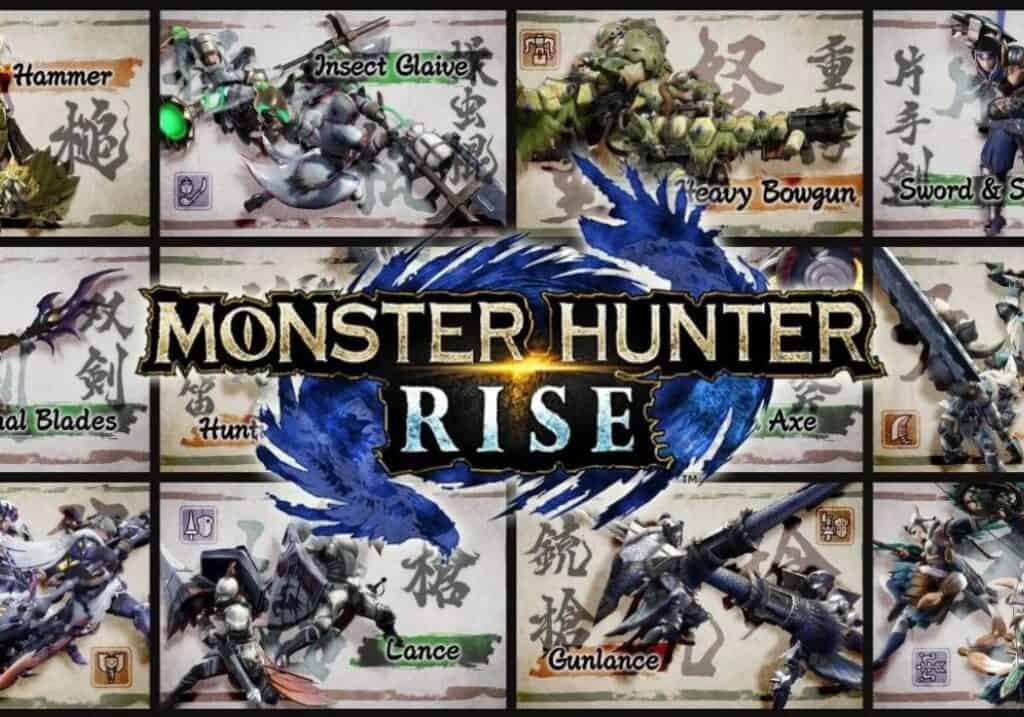
Players can battle a training monster in the training area. The game will display players’ combinations while they are attacking it, along with all of the available attacks.
Players can use this location to gain a firm understanding of their possible go-to Monster Hunter Rise weaponry because combos won’t show up on the screen in the same way for normal hunts.
Collect everything during quests
In Monster Hunter Rise, there are plenty of crafting materials available near each biome, so even if players don’t need anything, it’s advisable to take whatever is possible. It’s always worthwhile to have a full bag because items may be sold at the shop for decent Zenny.
It’s also important to note that each level has glowing small bugs that players may find by going near them. For the duration of the mission, these are called Permabuffers and will raise a hunter’s stats.
Upgrading is everything
At the Smithy, players can use resources to forge new weapons, create new armour sets, and improve existing weapons and armour. It would be beneficial to make sure that the equipped armour is in good condition and the weapons being used are improved to the maximum extent possible if players ever feel like they are hardly doing damage to a difficult boss monster.